 |
| From wood stuff 2010 |
The first couple times that I tried this machine I found that the wood wanted to slide under the clamp bars so I put sandpaper strips to control that .
I also had difficulty the 1/4 inch shank bits that I had on hand wsliding out of the collet adapter and spoiling the joints.
I replaced the collet with a new one from Lee Valley and purchased *8mm shank* bits as well as an *8mm adapter*.
I'm surprised how much better this combination seems to work in my router.
It makes me wonder why the industry ever produced quarter inch bits as they have been a pain in the ass since I started woodworking.
My "go to" router has become a Triton three and a quarter horsepower machine which has all the right features but of course, with a large motor, becomes a bit of a behemoth to move back and forth on the job.
 |
| From wood stuff 2010 |
 |
| From wood stuff 2010 |
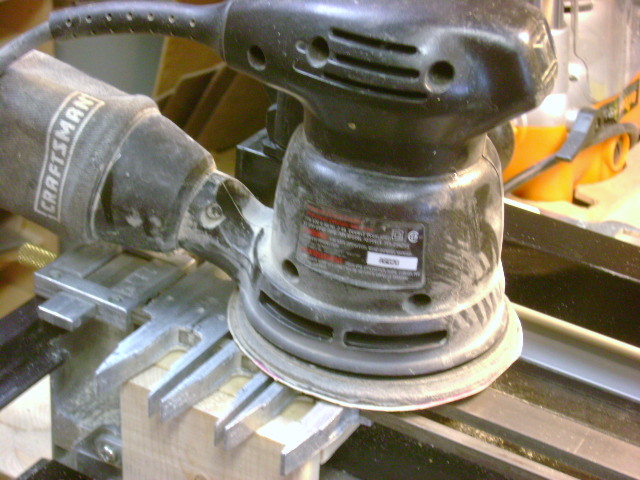
While setting the jig up to do a few test pieces I noticed that the fingers had several small imperfections from the casting process that made my router stall and catch in places in places making movements back-and-forth a bit jerky. I put a fresh piece of 180 grit sandpaper in my palm sander and gave all the mating surfaces a light buff. Just enough to remove imperfections.
I then gave the entire mating surfaces a light coat of Johnson paste wax to the base of my router.
The router slides on the table with one hand now!
 |
| From future projects 2010 |
 |
| From wood stuff 2010 |
 |
| From wood stuff 2010 |
The attached vacuum makes it extremely simple to rest the router between passes. I used to have to lift it over top of the jig and set it down between each pass.
 |
| From wood stuff 2010 |
 |
| From wood stuff 2010 |
 |
| From wood stuff 2010 |
No comments:
Post a Comment